
As promised to @Steve1981 I said that I had to capture the process of servicing a watch. This is part one of that. Hopefully it would be of use to some of the people who want to give it a try or even just those are interested in seeing how I go about this. Apologies for the quality of pictures the general rotation and not consistent direction. Something I need to sort out is a camera and lighting.
I thought I’d just give a little bit of insight into what I do. Very happy for any comments or constructive criticism if anybody has any. Also, I’m aware that my bench mat is dusty and dirty! This is for disassembly it will be cleaned before reassembly. I was fighting the clock a little bit.
![Image]()
![Image]()
The first thing I will do is have a quick visual on the outside. If it’s covered in all sorts of DNA, it will get a cursory clean before I go anywhere near the inside. On this one, the crown was actually completely locked and so there was a full wind in the spring. I had a real challenge getting the back as it was really tight and the notch has been put in a less than desirable position. Once I finally got it off (which I knew I could as the seller have pictures with the back off) I had another quick visual for any dirt inside or rust.
![Image]()
I let down the main spring all the way by releasing the click. Interestingly this is something that I’ve never seen before (I’m fairly early in my watch servicing journey) is this gooseneck type click spring. I then put some wind back into the main spring to see if the watch will spring back to life. In this case it didn’t and so I gave the balance a quick blow with some air to see if it would move freely. It did move a bit which means that probably the impulse jewel is in the correct place. What’s encouraging is that the hands also turn as the balance does. It’s probably just gummed up with old oil. A classic need of a service.
Next I de-case the movement and take the hands and dial off. It looks pretty nice in there; a few specs on the dial which I’ll maybe have a look at later. Given the lug width is 16mm and the style I’d guess this is a 50s watch. Perhaps later down the line, I’ll find something out. It also appears to be gold plated or rolled, but I can’t see any hallmarks anywhere.
![Image]()
With the dial safely stored in the box I next take off the dial washer, hour wheel and then the canon pinion. And now I’ll switch to the movement holder. I’m taking lots of pictures as I go so that I don’t mess up when it goes back together.
Before I continue, I’ll let down the main string entirely to ensure that there’s no risk of damaging it later.
I like to start with the dial side and get the keyless works out. After that I flipped the movement over and then remove the setting lever screw if it hasn’t dropped out, click spring and it’s screw.
![Image]()
![Image]()
Next is the ratchet wheel and I guess the barrel bridge? I can’t find any identifying marks on this movement so I’m really going in a little bit blind. (Post disassembly note, It’s a CAL400 from Ingersoll). One of the reasons I really love this Bergeron plastic movement holder is because you can really tighten it down without worry of damaging the movement so it doesn’t escape from you when you put pressure on a screw to unwind it.
![Image]()
Any screws that are different lengths that come out the holes I like to rest back on the movement and take a picture so I’ve got a reference of where they came out of in this case. There’s two different length screws which fit in different holes, one of them is shouldered and one of them is not. I also like to capture the screws with the part they come off in my parts container.
![Image]()
I’ve noticed something here which again is completely alien to me. The winding wheel is attached to the bridge and the barrel is open. I guess this makes servicing much easier and also the bill of parts cheaper.
The barrel is slightly captured by the train bridge so the balance and the train bridge will have to come off next. This reveals the escapement underneath.
![Image]()
![Image]()
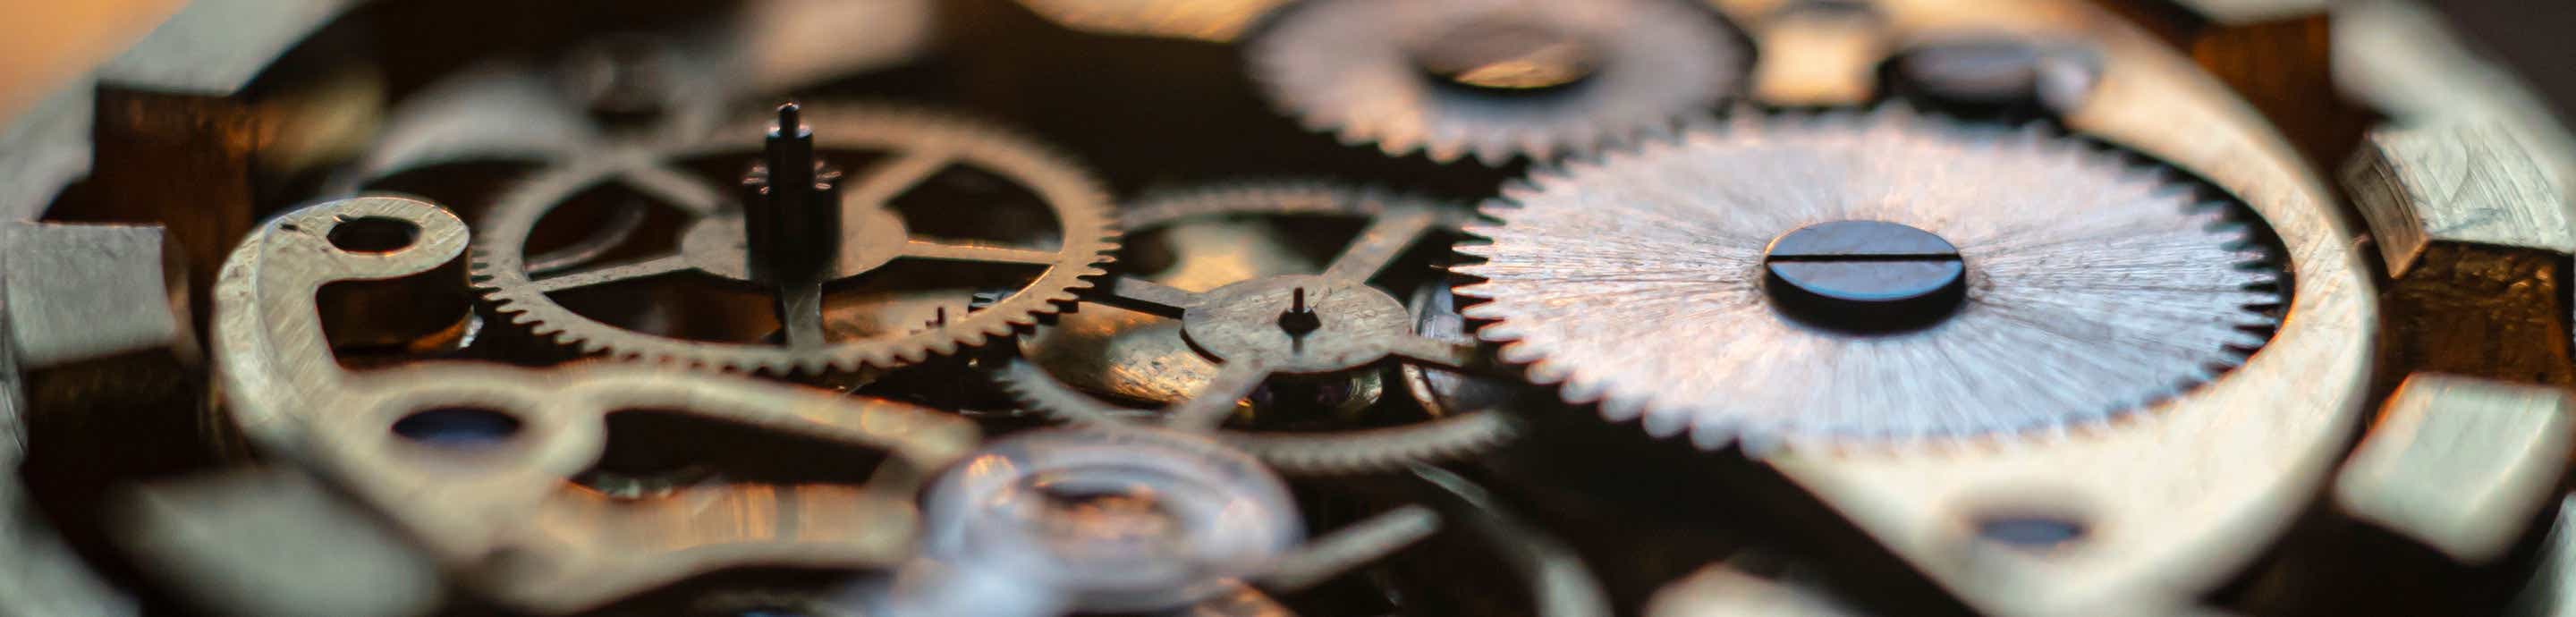
Once the train bridge is off, we can see all the wheels. I’ve tried to lay them out in the picture for reference when I put them back together. I’ve also removed the barrel and the last piece here is a brass block which holds an intermediate wheel.
![Image]()
And that’s the movement stripped ready to clean. There are seven jewels on this one, one on the balance and one of the main plate and the rest on the bridges. I’ll have a go at those after it’s been through the first wash.
![Image]()
I thought I’d just give a little bit of insight into what I do. Very happy for any comments or constructive criticism if anybody has any. Also, I’m aware that my bench mat is dusty and dirty! This is for disassembly it will be cleaned before reassembly. I was fighting the clock a little bit.
The first thing I will do is have a quick visual on the outside. If it’s covered in all sorts of DNA, it will get a cursory clean before I go anywhere near the inside. On this one, the crown was actually completely locked and so there was a full wind in the spring. I had a real challenge getting the back as it was really tight and the notch has been put in a less than desirable position. Once I finally got it off (which I knew I could as the seller have pictures with the back off) I had another quick visual for any dirt inside or rust.
I let down the main spring all the way by releasing the click. Interestingly this is something that I’ve never seen before (I’m fairly early in my watch servicing journey) is this gooseneck type click spring. I then put some wind back into the main spring to see if the watch will spring back to life. In this case it didn’t and so I gave the balance a quick blow with some air to see if it would move freely. It did move a bit which means that probably the impulse jewel is in the correct place. What’s encouraging is that the hands also turn as the balance does. It’s probably just gummed up with old oil. A classic need of a service.
Next I de-case the movement and take the hands and dial off. It looks pretty nice in there; a few specs on the dial which I’ll maybe have a look at later. Given the lug width is 16mm and the style I’d guess this is a 50s watch. Perhaps later down the line, I’ll find something out. It also appears to be gold plated or rolled, but I can’t see any hallmarks anywhere.
With the dial safely stored in the box I next take off the dial washer, hour wheel and then the canon pinion. And now I’ll switch to the movement holder. I’m taking lots of pictures as I go so that I don’t mess up when it goes back together.
Before I continue, I’ll let down the main string entirely to ensure that there’s no risk of damaging it later.
I like to start with the dial side and get the keyless works out. After that I flipped the movement over and then remove the setting lever screw if it hasn’t dropped out, click spring and it’s screw.
Next is the ratchet wheel and I guess the barrel bridge? I can’t find any identifying marks on this movement so I’m really going in a little bit blind. (Post disassembly note, It’s a CAL400 from Ingersoll). One of the reasons I really love this Bergeron plastic movement holder is because you can really tighten it down without worry of damaging the movement so it doesn’t escape from you when you put pressure on a screw to unwind it.
Any screws that are different lengths that come out the holes I like to rest back on the movement and take a picture so I’ve got a reference of where they came out of in this case. There’s two different length screws which fit in different holes, one of them is shouldered and one of them is not. I also like to capture the screws with the part they come off in my parts container.
I’ve noticed something here which again is completely alien to me. The winding wheel is attached to the bridge and the barrel is open. I guess this makes servicing much easier and also the bill of parts cheaper.
The barrel is slightly captured by the train bridge so the balance and the train bridge will have to come off next. This reveals the escapement underneath.
Once the train bridge is off, we can see all the wheels. I’ve tried to lay them out in the picture for reference when I put them back together. I’ve also removed the barrel and the last piece here is a brass block which holds an intermediate wheel.
And that’s the movement stripped ready to clean. There are seven jewels on this one, one on the balance and one of the main plate and the rest on the bridges. I’ll have a go at those after it’s been through the first wash.


